![[Deprecated] Lalyan Cosmetic Core](https://media.forgecdn.net/avatars/1623/718/639043392481170312.png)
 Mobs\Characters
 Furniture
 Quality of Life
 Library
 Utility
English
Lalyan Cosmetic Core
An API to register and customize cosmetics without using armor slots
Custom Wardrobe model and texture are made by EtherealShigure.
Introduction
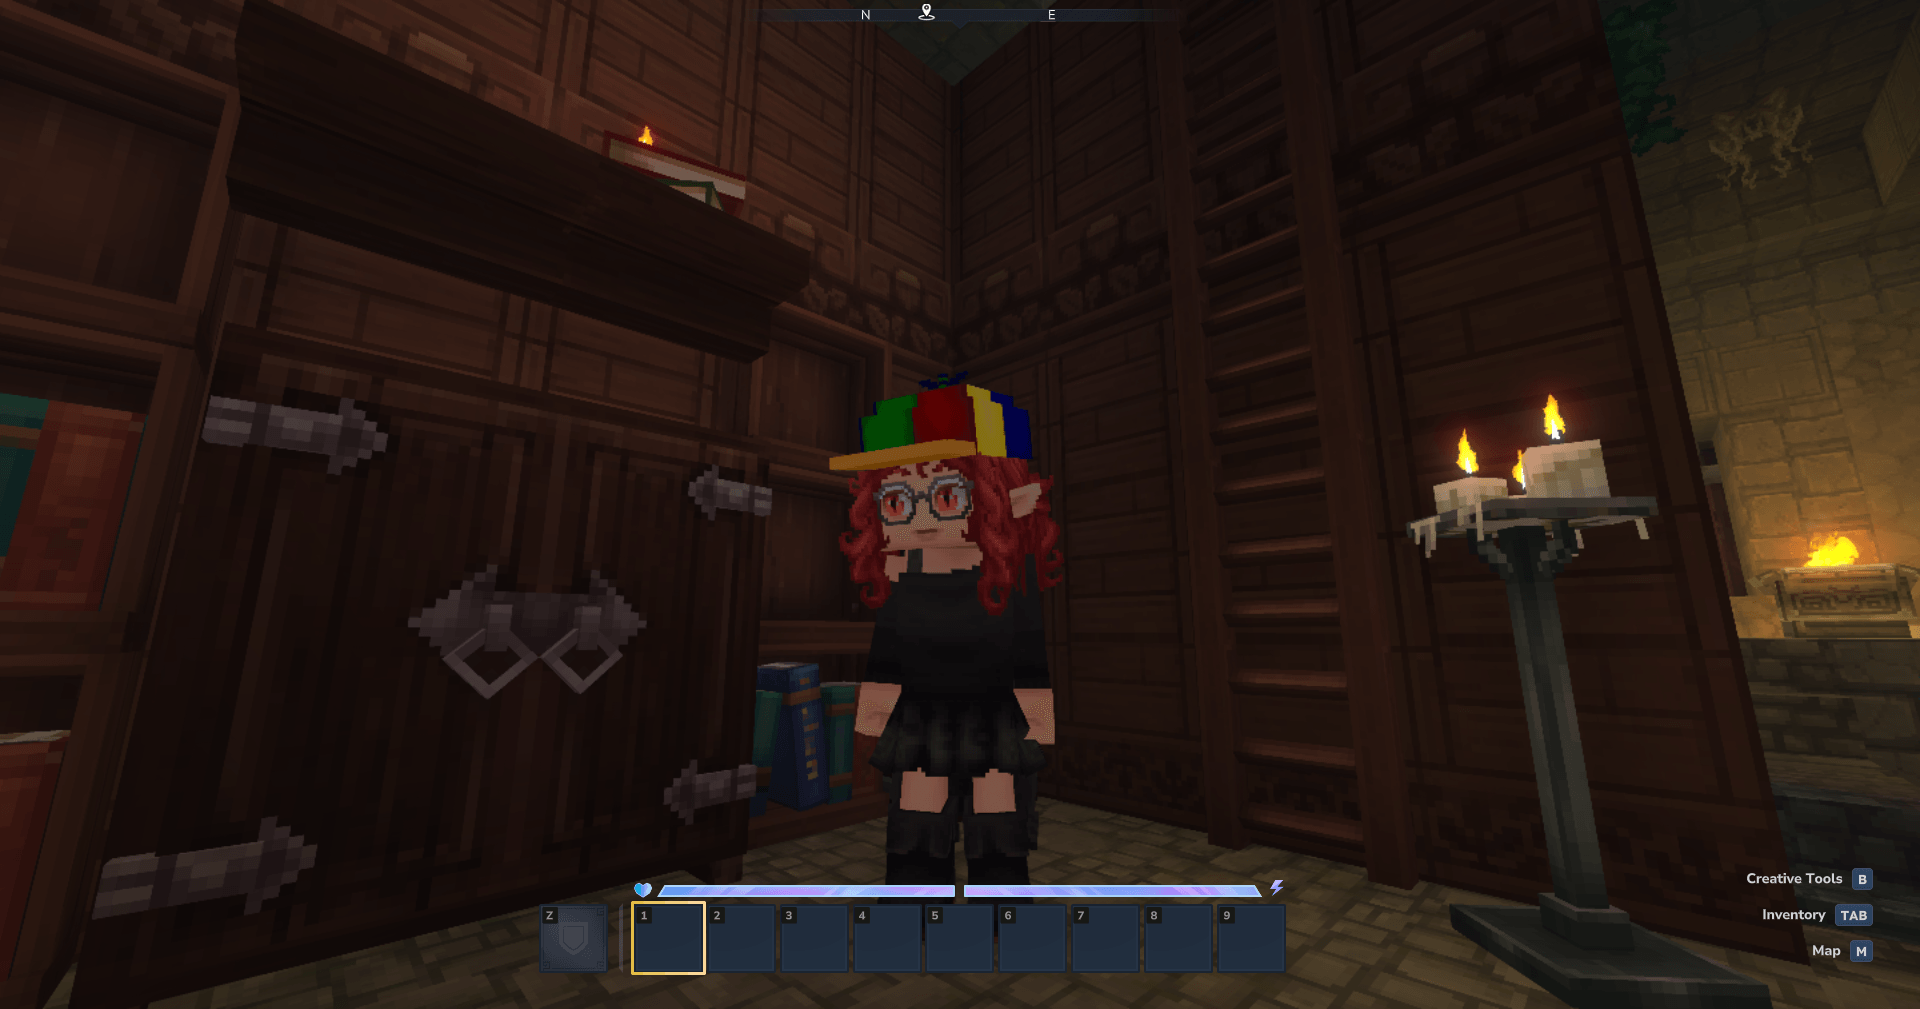
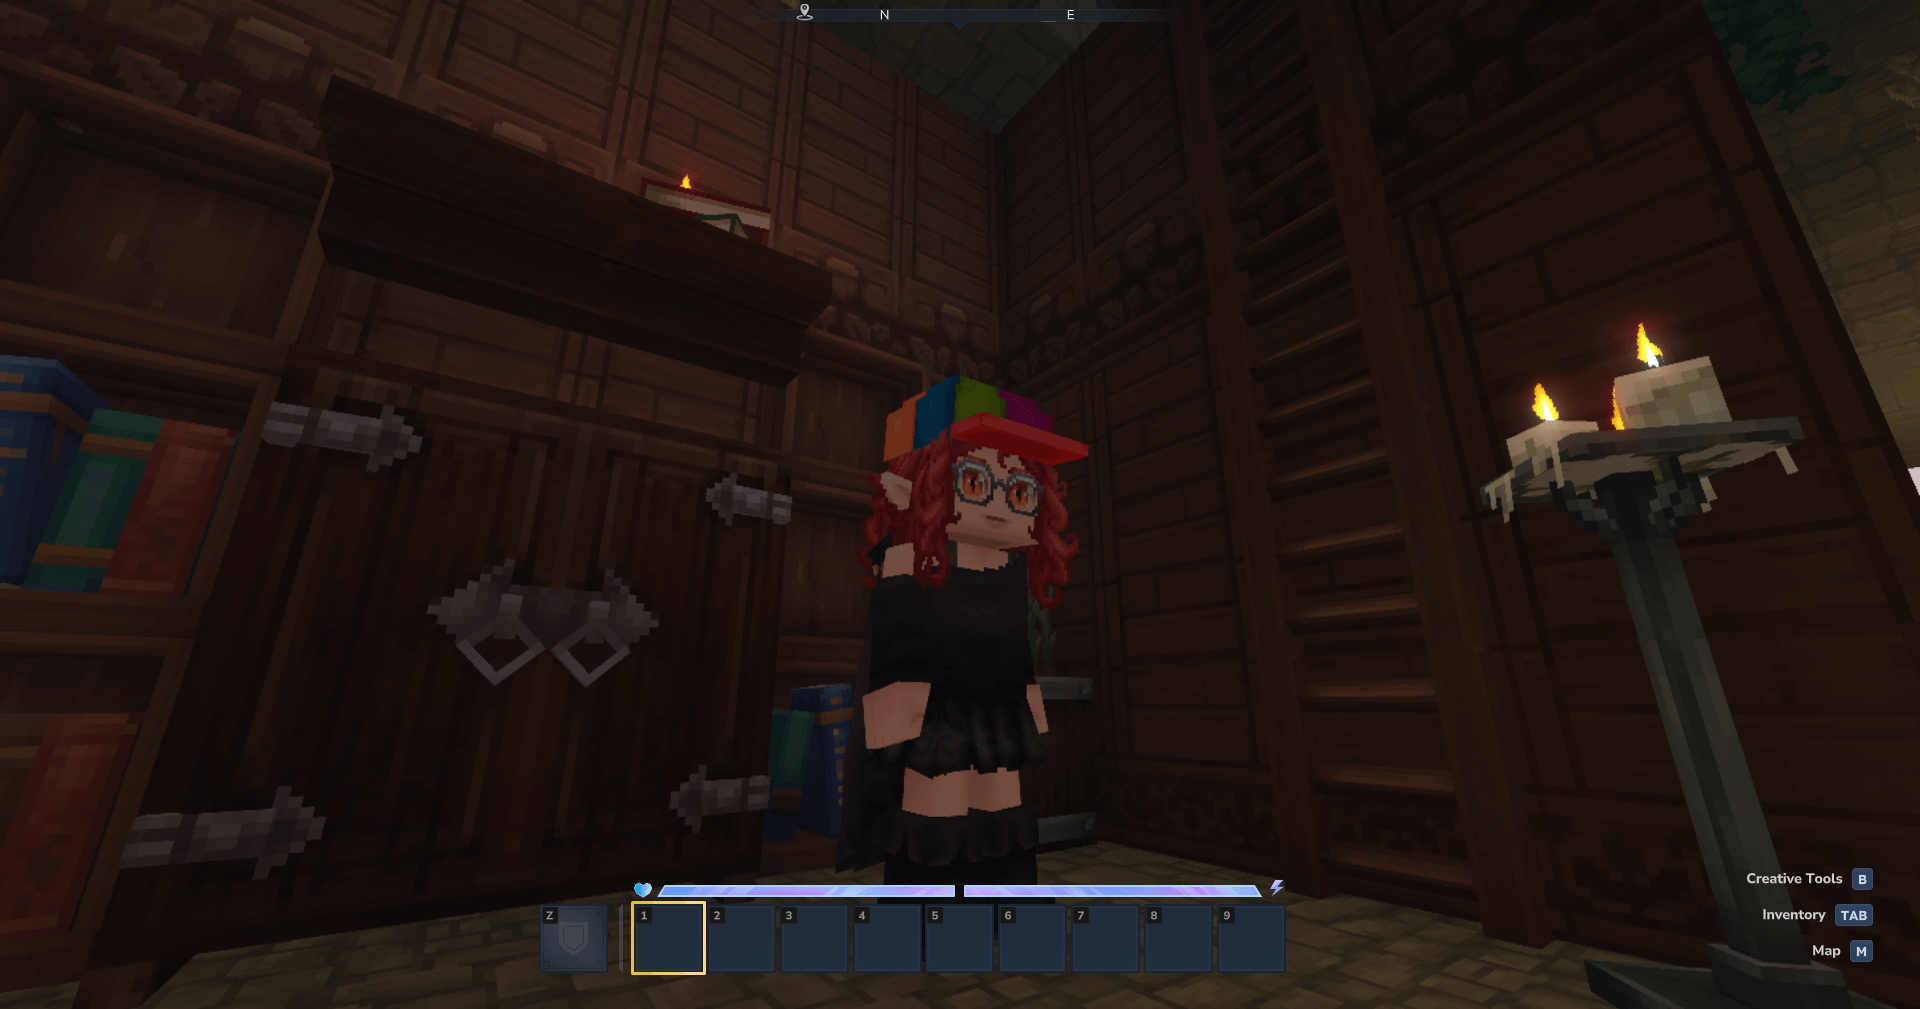
This plugin allows players to customize which cosmetic they have equipped, without having to use up their armor slots
It also allows plugin makers to create their custom cosmetics, without needing any java code!
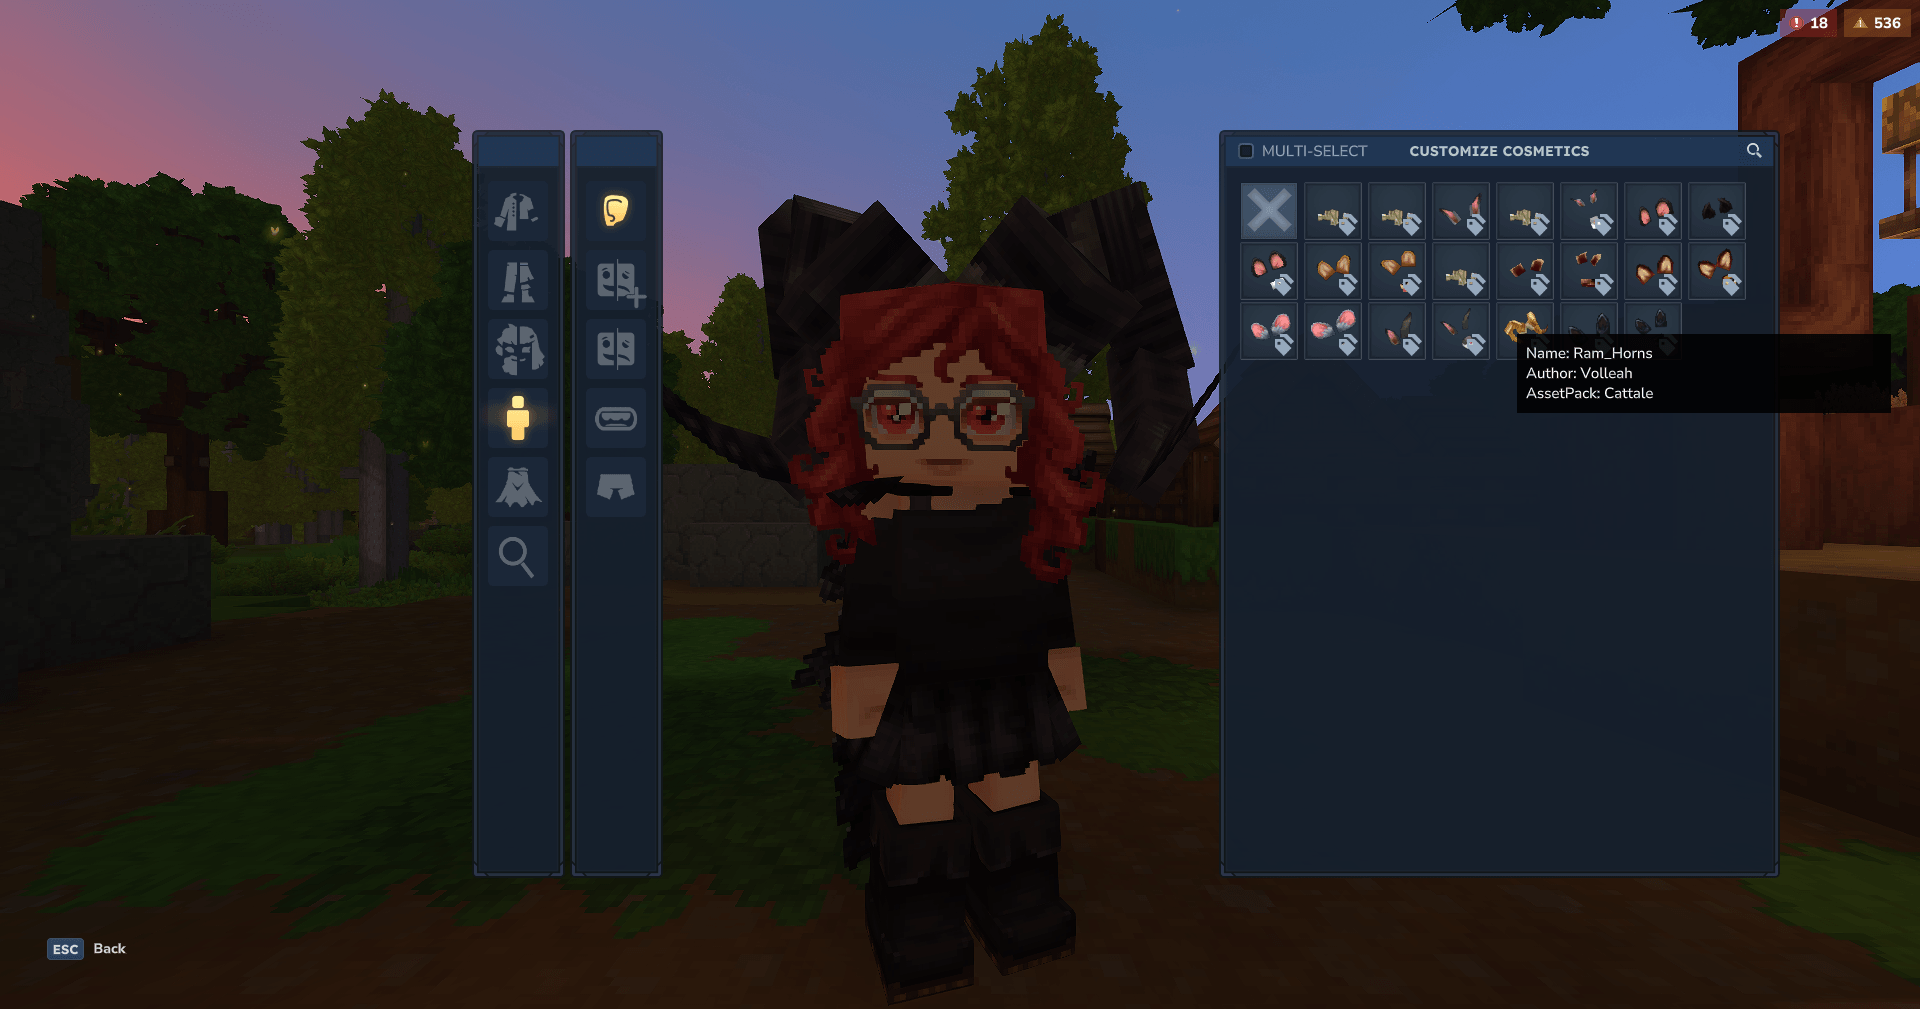
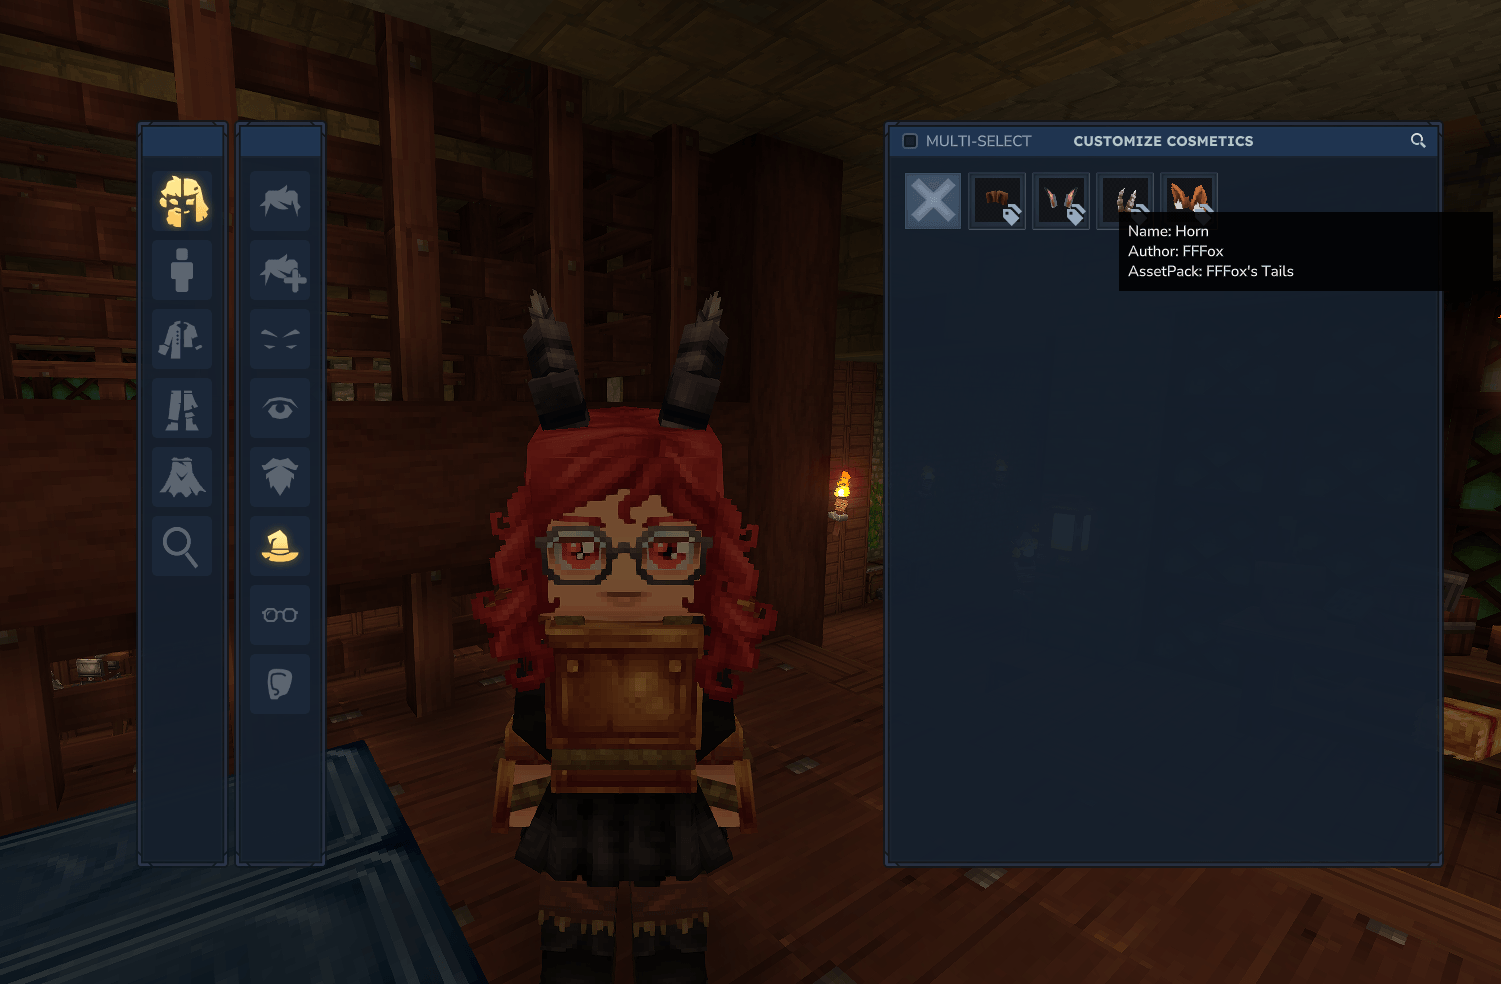
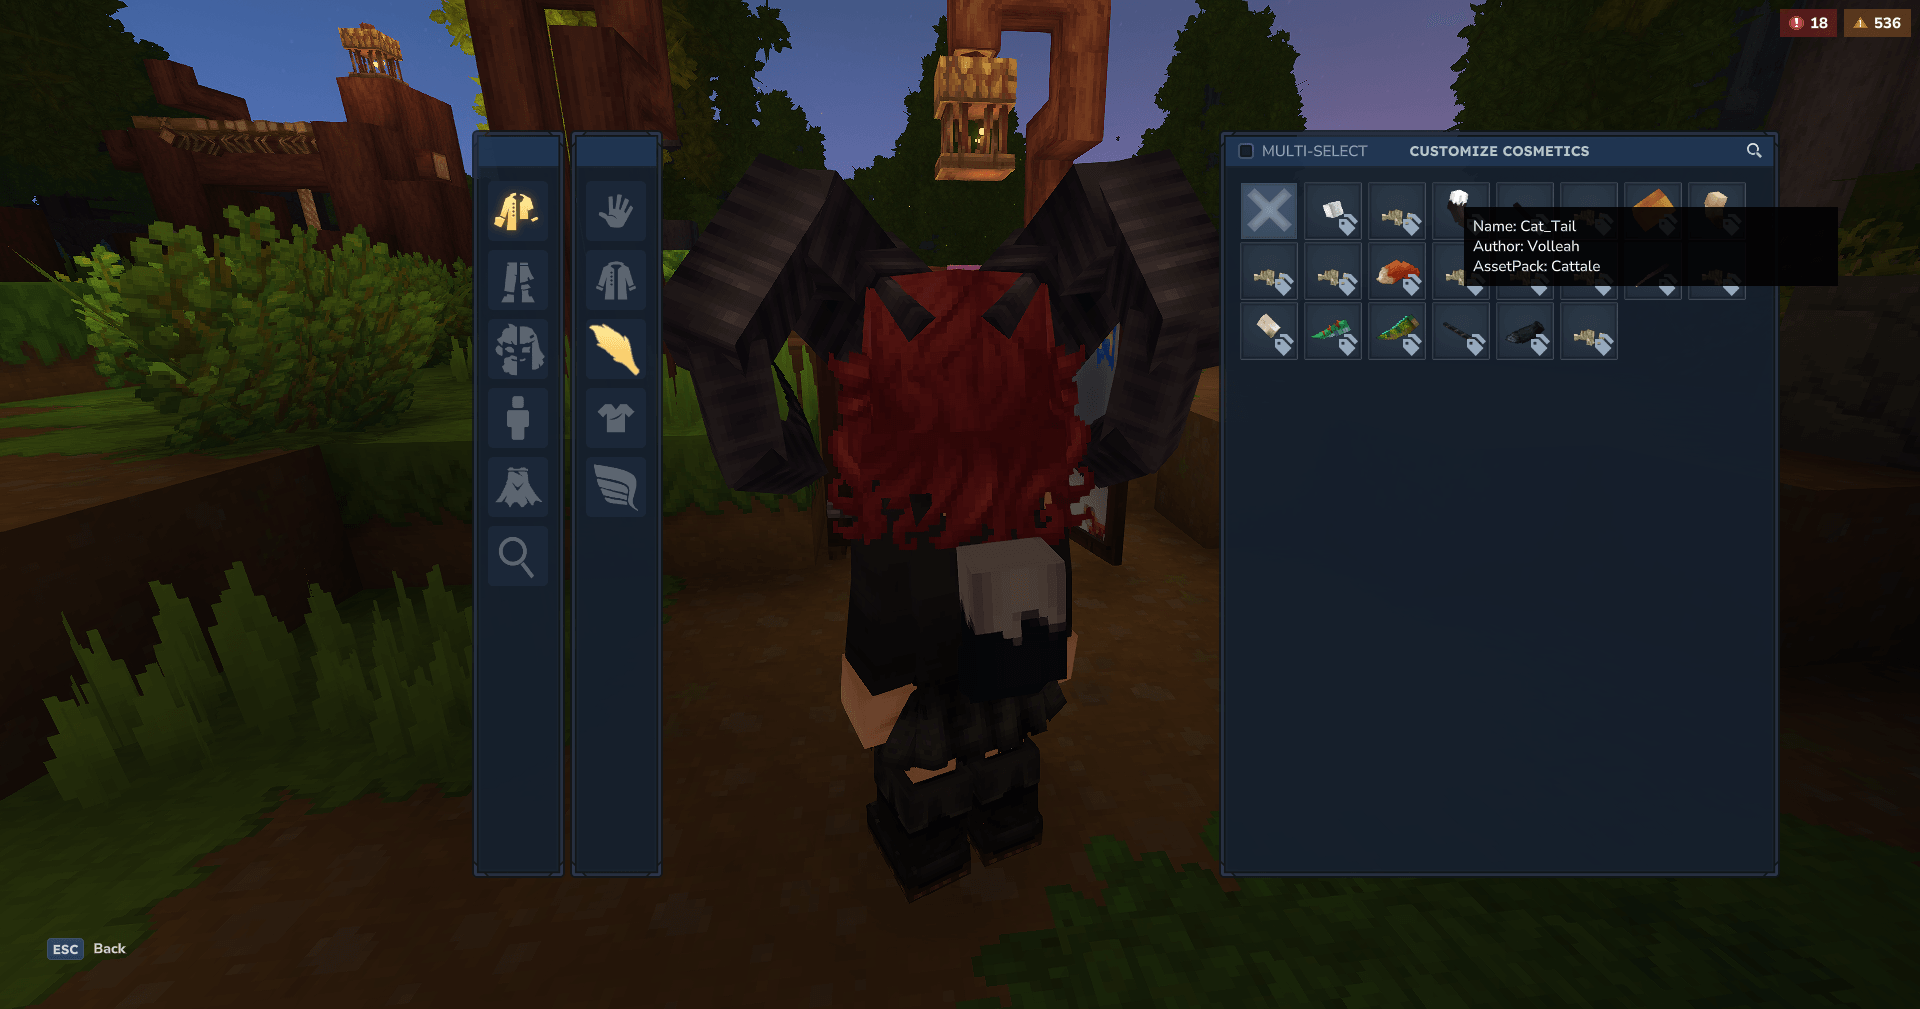
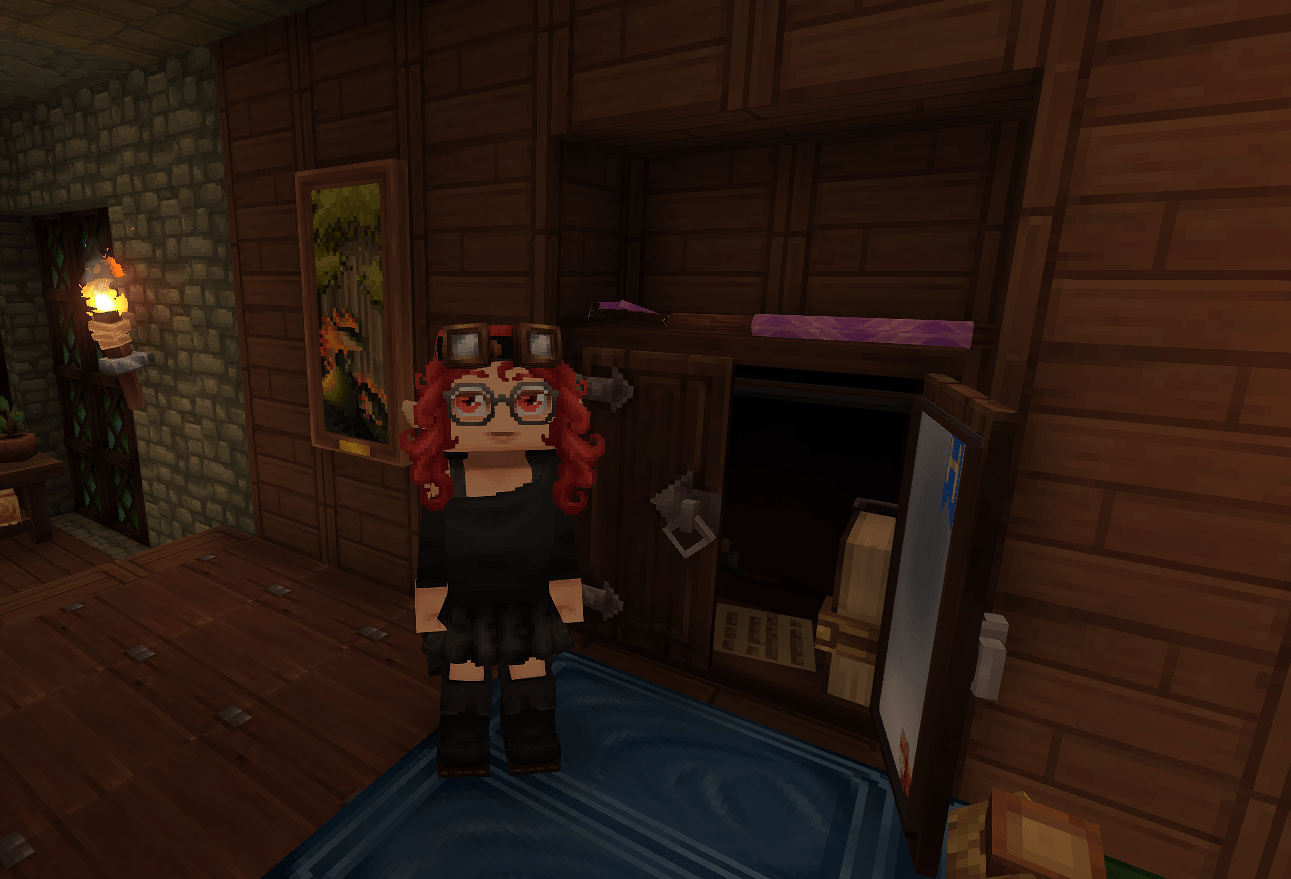
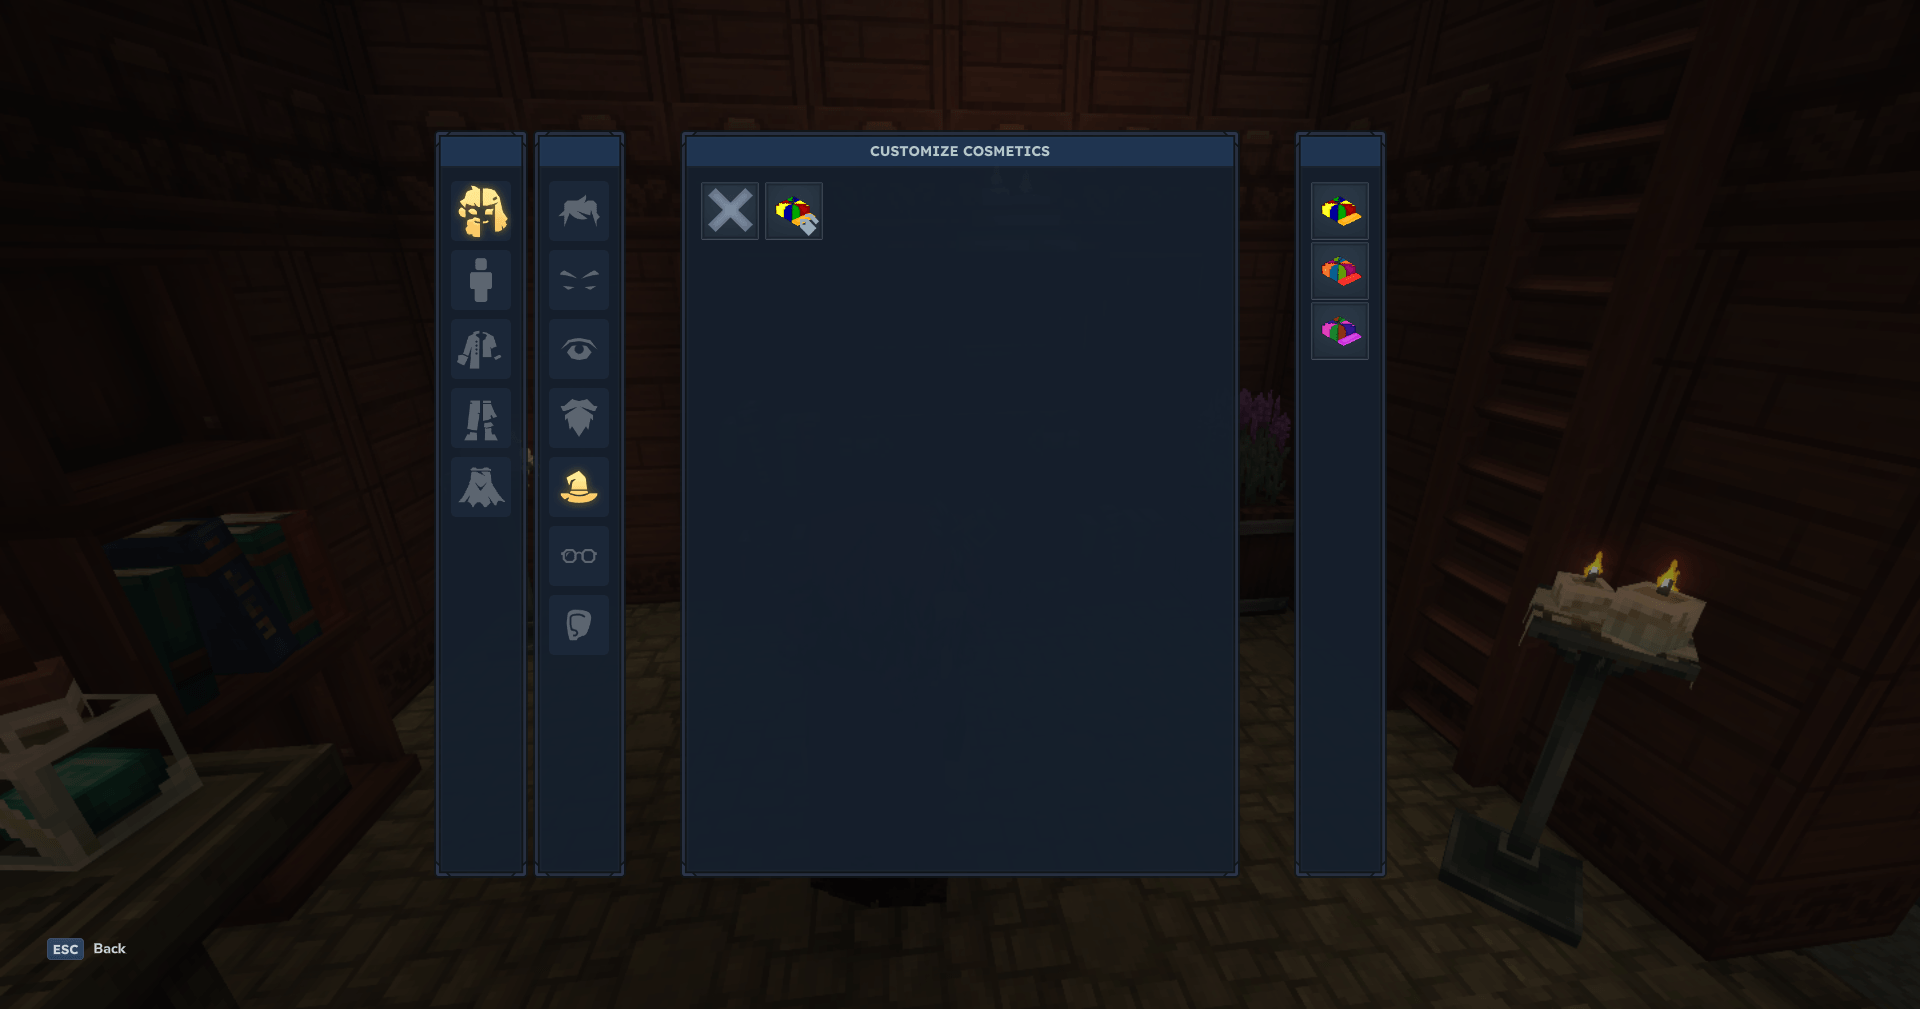
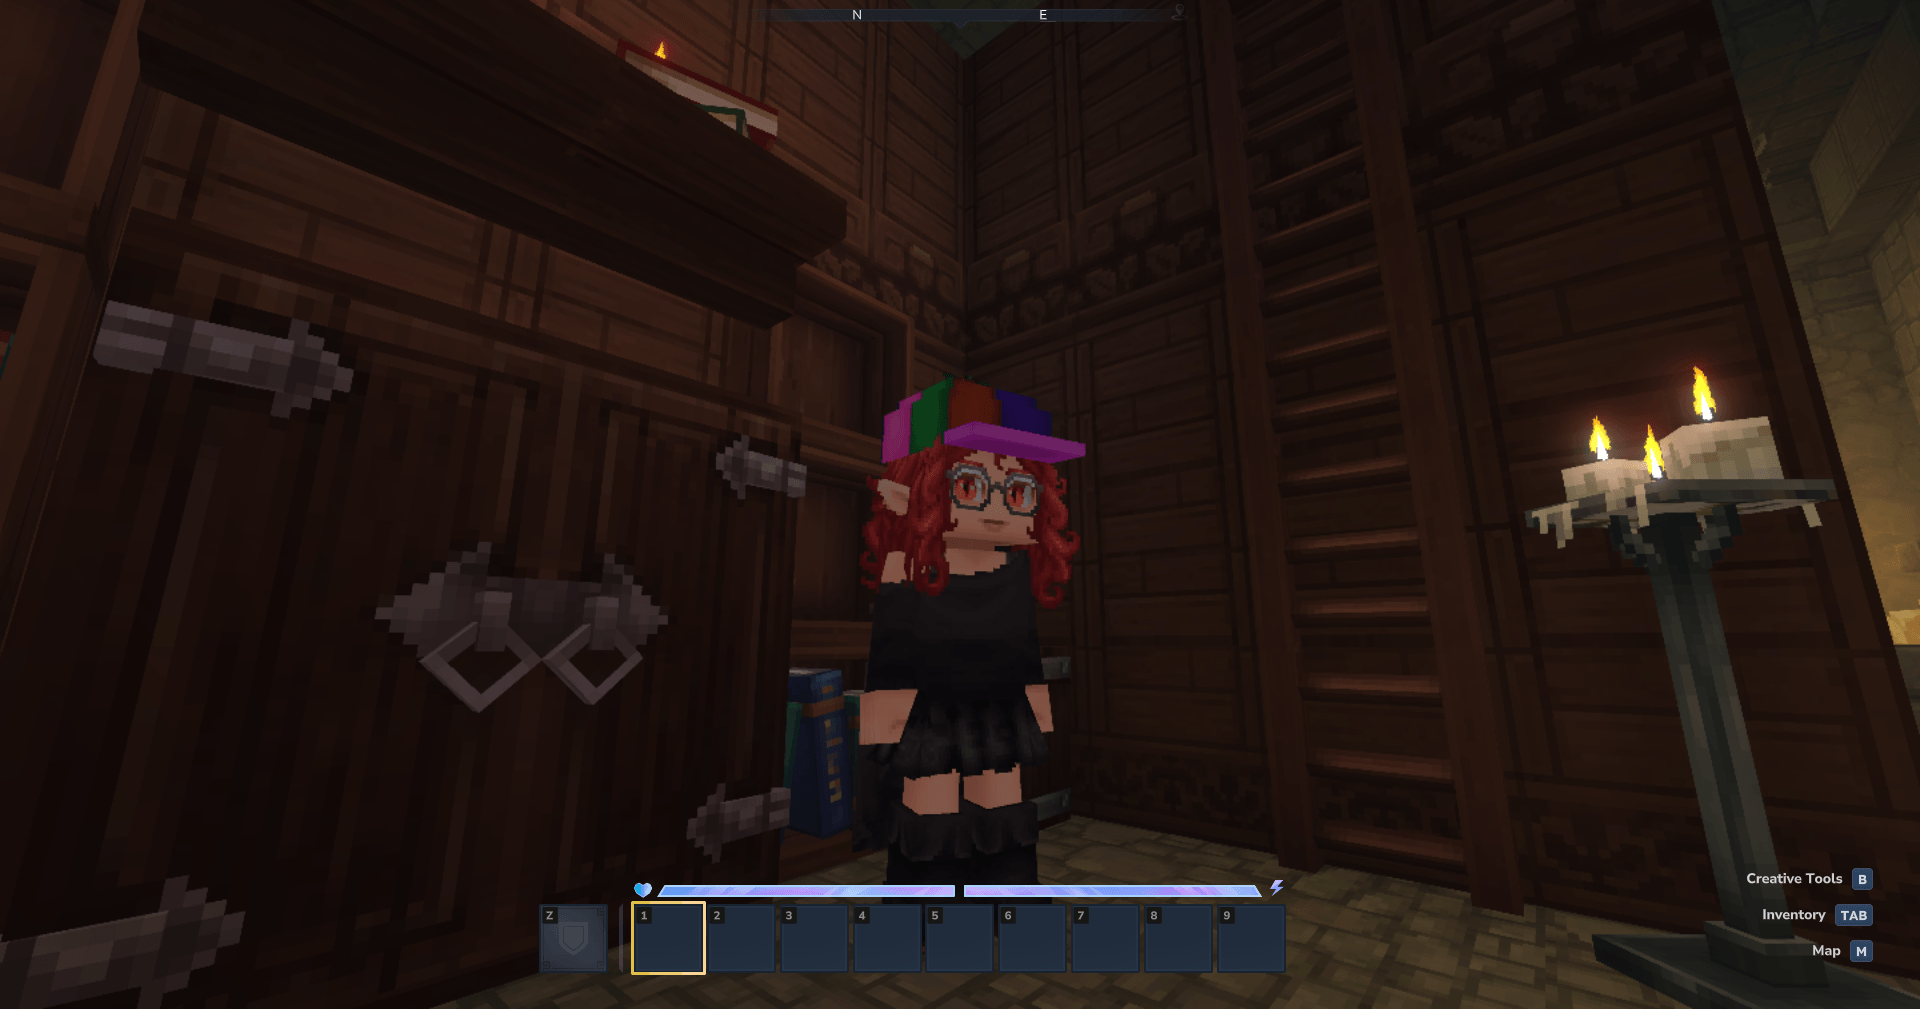
The plugin features a custom GUI to customize cosmetics, which can be opened by command or, in a more immersive way, by crafting the Cosmetic Wardrobe
The Cosmetic Wardrobe can be crafted in the Builder's Workbench using 4 of any Hardwood
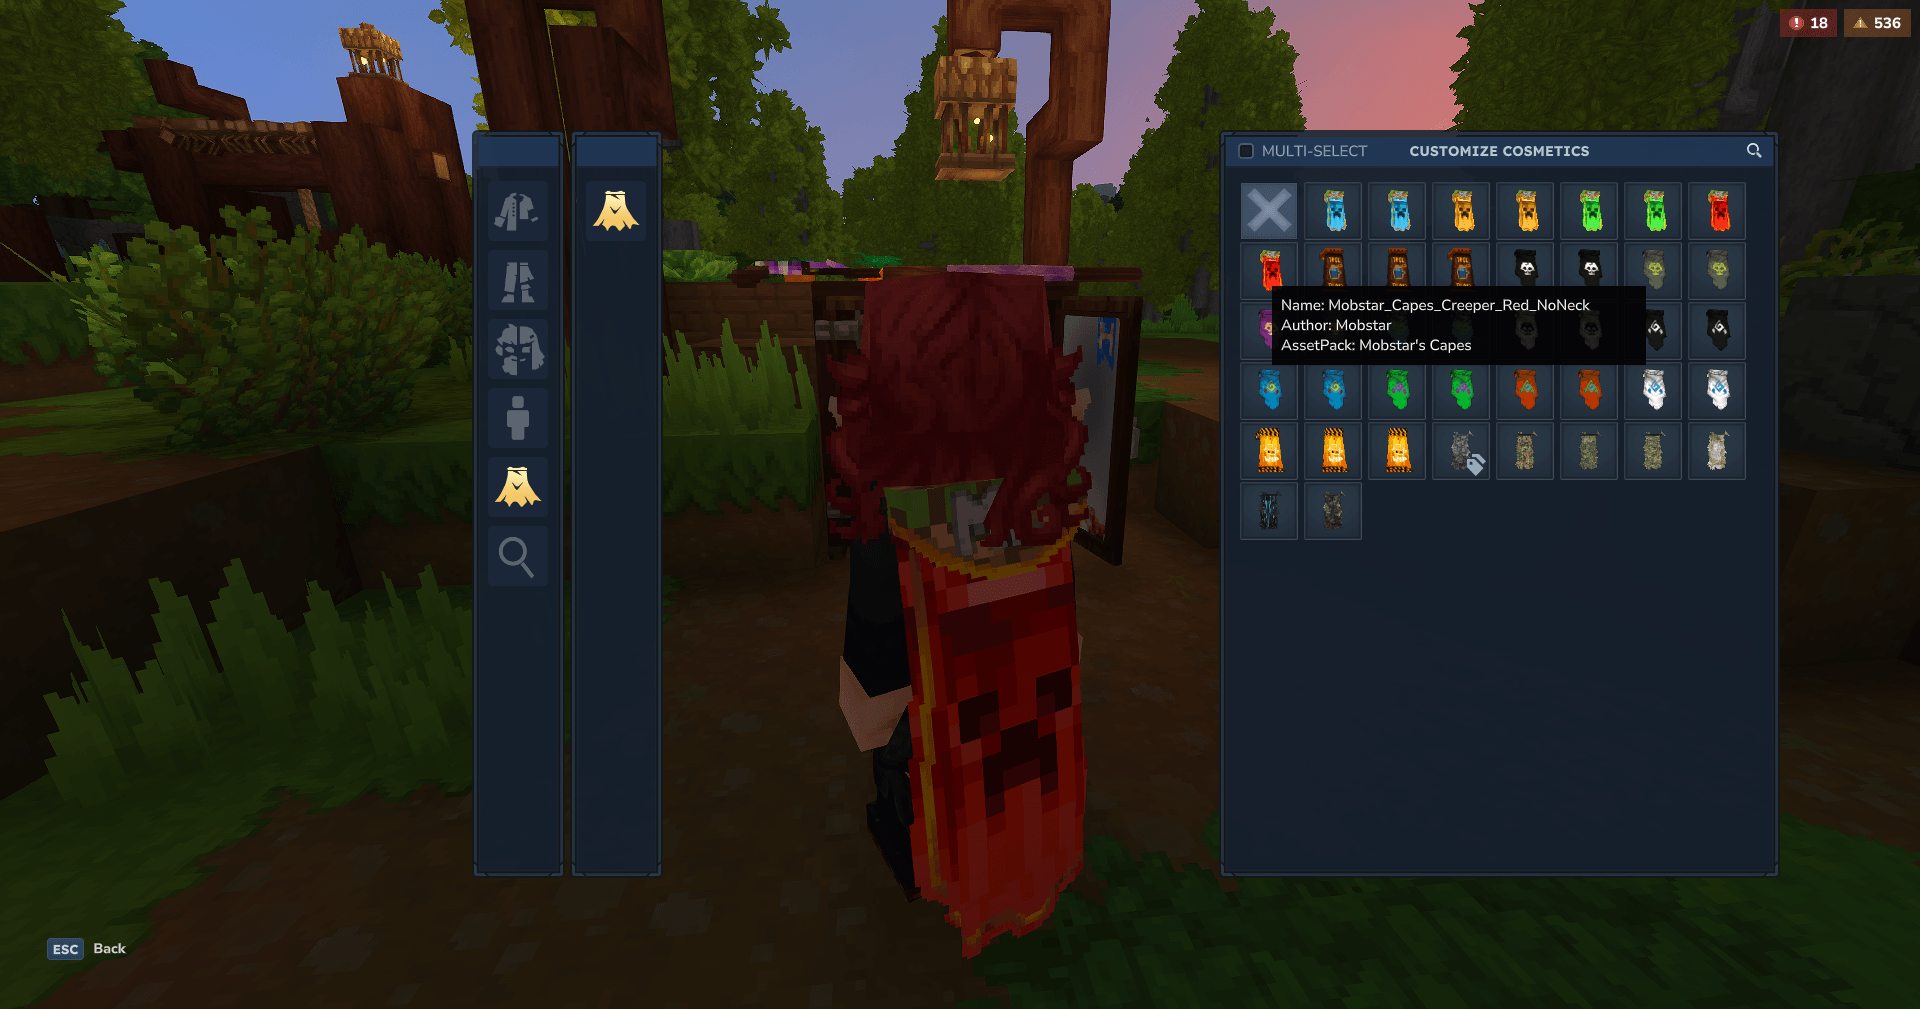
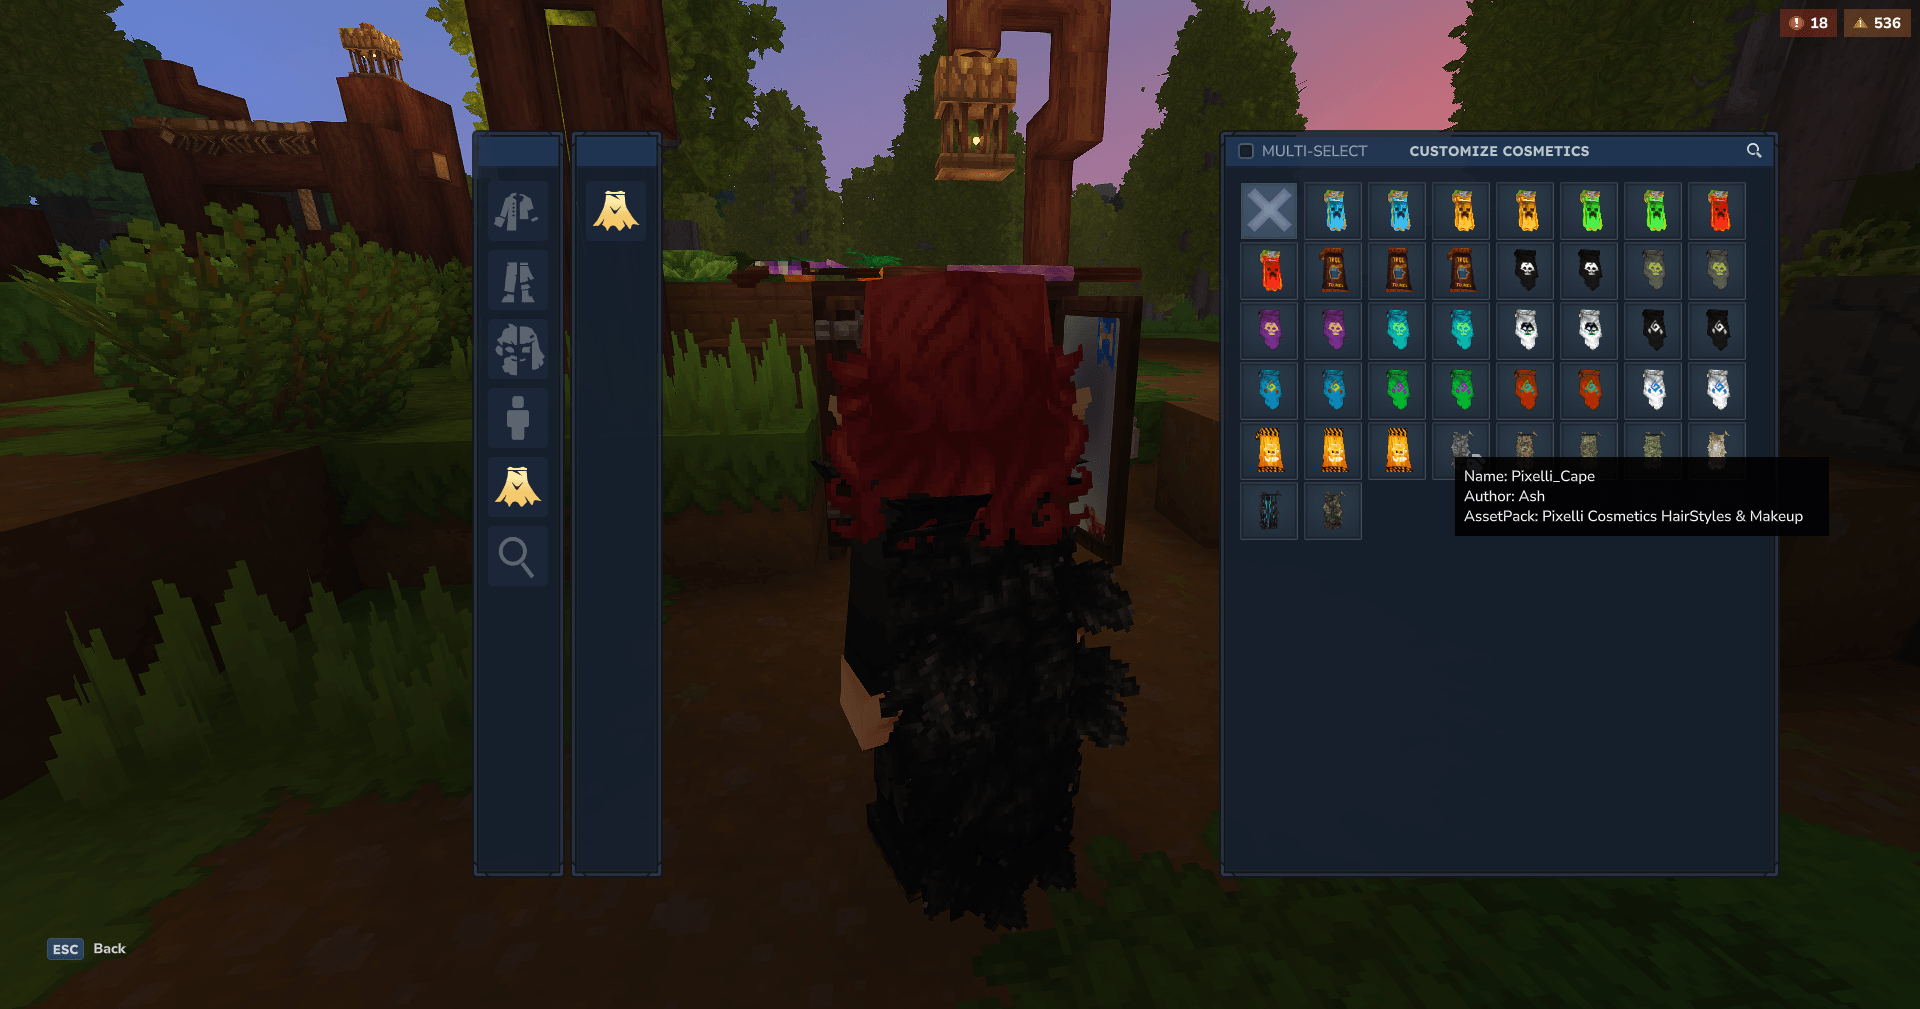
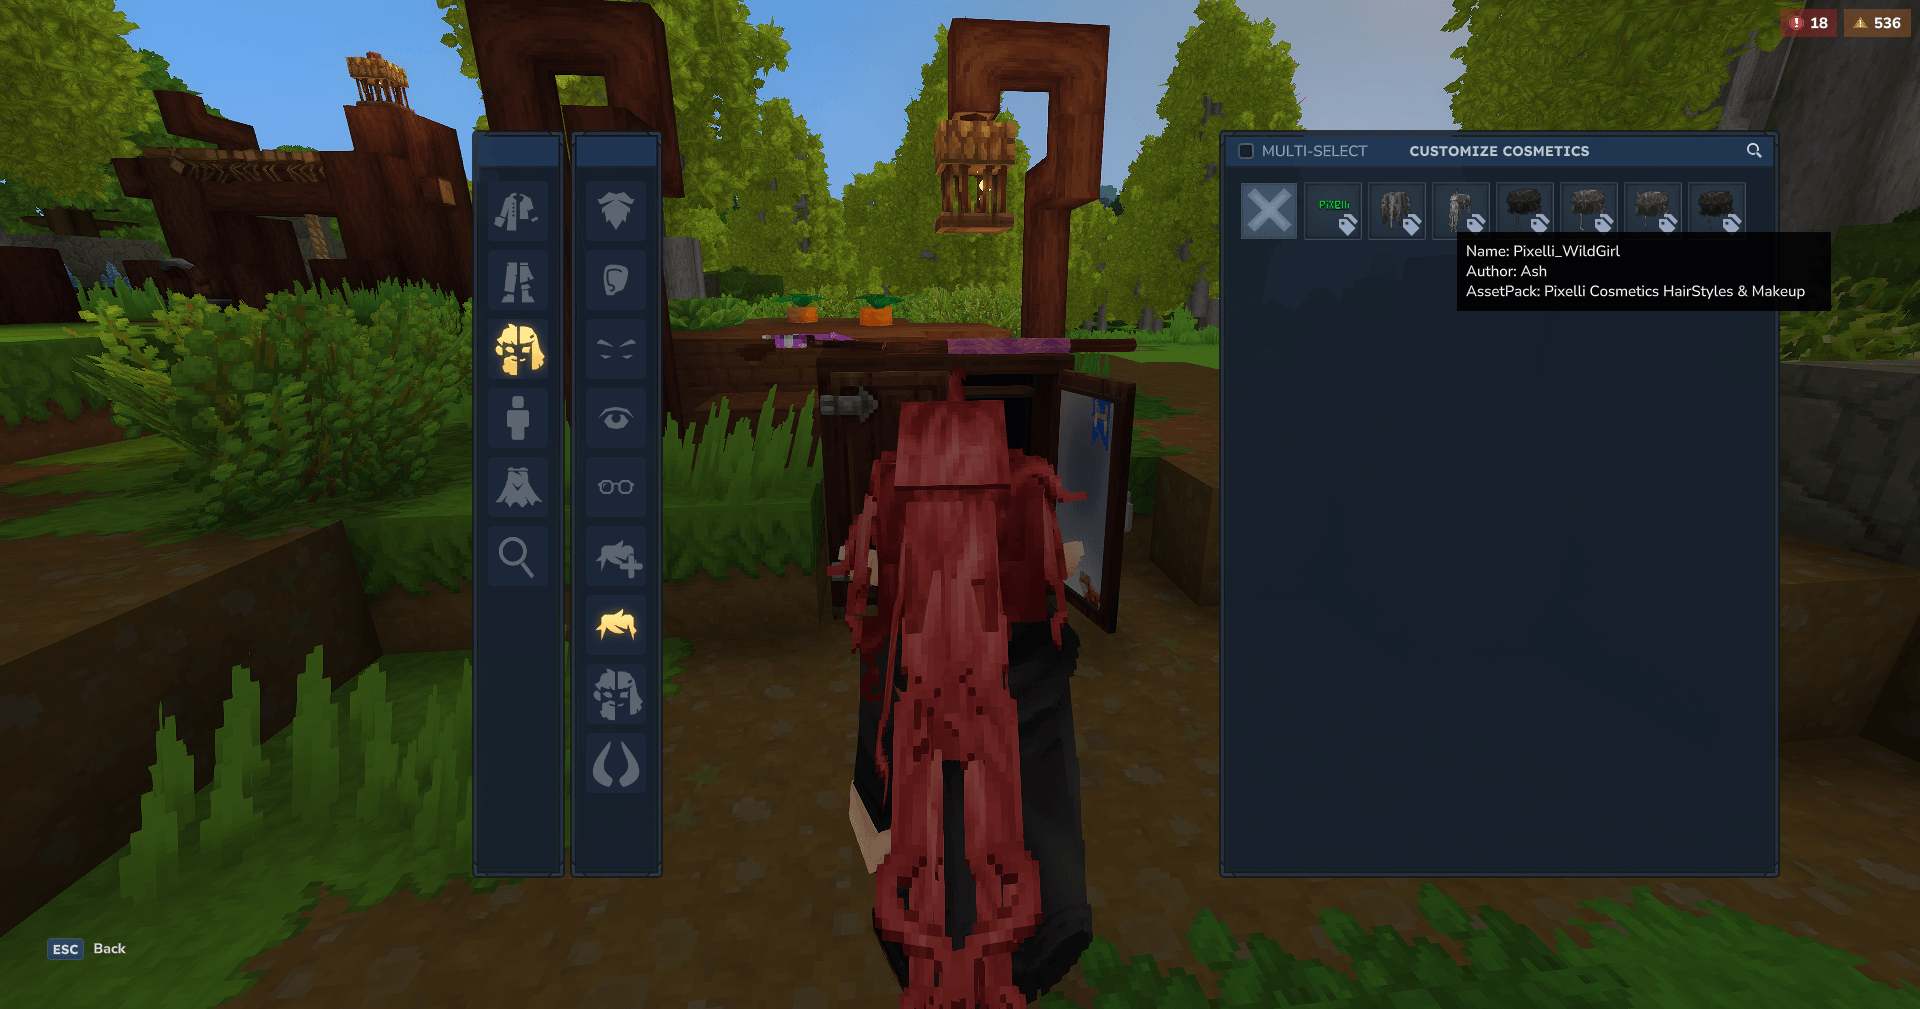
The GUI provides an easy way to select cosmetics and cosmetic variants. Left-click on a cosmetic to equip it, if the cosmetic has the variant icon, right-click it to open the variant menu!
Commands
The plugin has some commands that are mainly for testing purposes:
-
/cosmetic apply <CosmeticId> [override]manually applies a certain cosmetic defined byCosmeticId,overrideis optional, default isyes [other value is no], determines whether all other cosmetics of its type should be removed. Requires OP -
/cosmetic changemanually opens the Cosmetic Customization UI. Does not require permissions -
/cosmetic listprints in chat all loaded cosmetic ids. Requires OP -
/cosmetic reloadmanually reloads all cosmetics. Requires OP -
/cosmetic clearremoves all custom cosmetics and resets the default skin. Requires OP
Registering cosmetics
!Warning! Remember that the name you give to the files is important!
Registering a cosmetic is quite simple. You'll need to make an asset pack (obviously), and will need 3 files:
- The cosmetic's .blockymodel
- The cosmetic's .png texture
- The cosmetic's .png icon, which is the same icon you would use for the item!
These files must be named in the same way, that being CustomID.extension
Each cosmetic will be its own folder, with this structure
CustomID/
├── CustomID.blockymodel
├── CustomID.png
└── Icon/
    └── CustomID.png
Then the cosmetic will go in a certain folder, depending on the type:
Cosmetics Slots
The base path for cosmetics is Common/Resources/ (For backwards compatibility the folders Common/Resources/Cosmetics and Common/Resources/Characters are also checked), then the folder based on the slot, which can be:
CapesEars_AccessoriesGlovesHeadFace_AccessoriesOverpantsOvertopsPantsShoesUndertopsUnderwearsBeardsEarsEyebrowsEyesFacesMouthHaircutsHair_ExtensionWingsTailsHornsFace_Details
Then the folder you made before.
So, for a cosmetic called Custom_Cape, which is in the cape slot it would be like this:
Common/Resources/Capes/Custom_Cape and inside the Custom_Cape folder:
Custom_Cape/
├── Custom_Cape.blockymodel
├── Custom_Cape.png
└── Icon/
    └── Custom_Cape.png
The Hair_Extension slot automatically takes the same gradient as the Hairstyle.
Variants (optional)
!Warning! Variants and colors are mutually exclusive!
!Warning! Hair extensions cannot have variants nor colors, they changes according to the hairstyle!
This API also allows you to add variants.
To add variants, you will need to add the variant texture and icon inside your cosmetic's folder.
The variant textures must be placed in the cosmetic folder (CustomID) and named as follows:
CustomID_Variant_VariantName.png
The variant icons must have the same name given to the variant texture, but unlike the texture, they must be placed inside the Icon/ folder.
Taking the Propeller_Hat as an example:
Propeller_Hat/
├── Propeller_Hat.blockymodel
├── Propeller_Hat.png
├── Propeller_Hat_Variant_Circus.png
├── Propeller_Hat_Variant_Rainbow.png
└── Icon/
    ├── Propeller_Hat.png
    ├── Propeller_Hat_Variant_Circus.png
    └── Propeller_Hat_Variant_Rainbow.png
Doing so, the API will load: Propeller_Hat, Propeller_Hat_Variant_Circus, Propeller_Hat_Variant_Rainbow.
They will be seen by the API as variants of the same cosmetic, so they will implicitly use Propeller_Hat.blockymodel
Colors (optional)
!Warning! Variants and colors are mutually exclusive!
!Warning! Hair extensions cannot have variants nor colors, they change according to the hairstyle!
This API also allows you to add multiple colors to a cosmetic!
To add colors you need to change the folder of your cosmetic like this: Cosmetic_Id_Colors_GRADIENTSET
The texture has to be grayscale (completely desaturated).
here's a list of all available gradient sets:
Colored_CottonEyes_GradientFaded_LeatherFantasy_CottonFantasy_Cotton_DarkFlashy_SyntheticHairJean_GenericOrnamented_MetalPastel_CottonRotten_FabricShiny_FabricSkin
Here's an example:
Item name: Sample_Shirt
Alternative: Colors
Gradient Set: Colored_Cotton
The folder name is: Sample_Shirt_Colors_Colored_Cotton
The folder structure is:
Sample_Shirt_Colors_Colored_Cotton/
├── Sample_Shirt.blockymodel
├── Sample_Shirt.png
└── Icon/
    └── Sample_Shirt.png
model, texture and icon's names have to be just the name without _Colors_GRADIENTSET
Advanced Cosmetics (optional)
Inside your cosmetic folder, you can add a Cosmetic_Id.json file. This file allows you to customize even more your cosmetics.
Within the JSON file, you are able to change the name and path of the model, texture and icon of your cosmetic. And that's not all, you'll also be able to define variants and color gradients of your cosmetic and if the cosmetic occupies MORE THAN ONE SLOT!
{
    "model": "Resources/Cosmetics/Head/Propeller_Hat/Propeller_Hat.blockymodel",
    "texture": "Resources/Cosmetics/Head/Propeller_Hat/Propeller_Hat.png",
    "icon": "Resources/Cosmetics/Head/Propeller_Hat/Propeller_Hat_Icon.png",
    "slot_overrides": [
        //Insert slots here, for example "Head", "Capes" etc
    ],
    "alternatives": {
        //THESE 2 ARE MUTUALLY EXCLUSIVE, YOU EITHER HAVE VARIANTS OR COLORS!!!
        //Choice 1 (Colors)
        "gradient_set": "Hair",
        //Choice 2 (Variants)
        "variants": {
            "Variant": {
              "texture": "Resources/Cosmetics/Head/Propeller_Hat/Variant/Variant.png",
              "icon": "Resources/Cosmetics/Head/Propeller_Hat/Variant/Variant_Icon.png"
            }
        }
    },
    "default_color": {
        "gradient_set": "Hair",
        "gradient_id": "Red"
    }
}
"model" Is the path of the base cosmetic model and any variants.
"texture" Is the path of the base cosmetic texture and any variants.
"icon" Is the path of the base cosmetic icon.
"alternatives" Defines that the cosmetic has 1 of 2 alternative styles
"default_color" If your cosmetic is grayscale, this can define which color the main slot should equip
Variant Alternative
"alternatives" > "variants" Announces the presence of variants that will be listed.
"alternatives" > "variants" > "variant1Name" Will be replaced with the name of the first variant.
"alternatives" > "variants" > "variant2Name" Will be replaced with the name of the second variant.
Inside the variant names mentioned above are the definitions of the variant components.
"alternatives" > "variants" > "variantName" > "texture" Is the path of the texture of the variant in question.
"alternatives" > "variants" > "variantName" > "icon" Is the path of the icon of the variant in question.
Color Alternative
"alternatives" > "gradient_set" Tells the game which gradient set to use
Gradient List:
Colored_CottonEyes_GradientFaded_LeatherFantasy_CottonFantasy_Cotton_DarkFlashy_SyntheticHairJean_GenericOrnamented_MetalPastel_CottonRotten_FabricShiny_FabricSkin
Custom Categories and Slots
Since version 2.0, you can also add custom Categories (The left-most buttons) and Slots (The middle-left buttons).
Categories are purely cosmetic, while slots can also be used when making a cosmetic
Cosmetic json schema:
{
  "Name": "Capes"
}
Name: The name to display when hovering over the button, also used when assigning it to a slot, CAN ONLY HAVE UPPERCASE OR LOWERCASE LETTERS, CANNOT HAVE NUMBERS, UNDERSCORES OR ANY OTHER SPECIAL CHARACTER
Slot json schema:
{
  "Name": "Capes",
  "Icon": "UI/Custom/Common/Categories/Categories/Capes.png",
  "SelectedIcon": "UI/Custom/Common/Categories/Categories/Selected/Capes.png",
  "TopLevelCategory": "Capes",
  "Camera": {
    "Distance": 2,
    "Position_Offset": {
      "X": 0.0,
      "Y": -0.3,
      "Z": 0.0
    },
    "LookAtBack": true
  },
  "CanVanish": true
}
Name: The name to display when hovering over the button, also used when assigning it to a cosmetic, CAN ONLY HAVE UPPERCASE OR LOWERCASE LETTERS, CANNOT HAVE NUMBERS, UNDERSCORES OR ANY OTHER SPECIAL CHARACTER
Icon: The icon of the button
SelectedIcon: The icon of the button used when the slot is the current one being displayed
TopLevelCategory: The category that will be assigned to the slot (see above)
Camera: The camera settings used when this slot is selected
CanVanish: Whether the slot has a vanish button (Faces is the only "vanilla" one that doesn't)
Italiano
Lalyan Cosmetic Core
Un'API per registrare e personalizzare cosmetici senza usare gli slot dell'armatura
Modello e texture del Custom Wardrobe sono fatti da EtherealShigure.
Introduzione
Questo plugin permette ai giocatori di personalizzare quale cosmetico hanno equipaggiato, senza dover usare i loro slot dell'armatura
Permette anche ai creatori di plugin di creare i loro cosmetici personalizzati, senza aver bisogno di alcun codice Java!
Il plugin fornisce una GUI per personalizzare i cosmetici, che può essere aperta tramite comando o, in un modo più immersivo, interagendo con il Guardaroba Cosmetico
Il Guardaroba Cosmetico può essere craftato in una Builder's Workbench con 4 di qualsiasi Hardwood
La GUI fornisce un modo semplice per selezionare cosmetici e varianti di cosmetici. Fai clic con il pulsante sinistro su un cosmetico per equipaggiarlo, se il cosmetico ha l'icona della variante, fai clic con il pulsante destro per aprire il menu delle varianti!
Comandi
Il plugin ha alcuni comandi che sono principalmente a scopo di test:
-
/cosmetic apply <CosmeticId> [override]applica manualmente un certo cosmetico definito daCosmeticId,overrideè opzionale, il valore predefinito èyes [l'altro valore è no], determina se tutti gli altri cosmetici del suo tipo devono essere rimossi. Richiede OP -
/cosmetic changeapre manualmente l'interfaccia utente di personalizzazione dei cosmetici. Non richiede permessi -
/cosmetic liststampa in chat tutti gli ID dei cosmetici caricati. Richiede OP -
/cosmetic reloadricarica manualmente tutti i cosmetici. Richiede OP -
/cosmetic clearrimuove tutti i cosmetici personalizzati e ripristina la skin predefinita. Richiede OP
Registrazione dei cosmetici
!Attenzione! Ricordati che il nome che dai ad i files è importante!
Registrare un cosmetico è abbastanza semplice. Dovrai creare un pacchetto di risorse (ovviamente), e avrai bisogno di 3 file essenziali:
- Il file .blockymodel del cosmetico
- La texture .png del cosmetico
- L'icona .png del cosmetico, che è la stessa icona che useresti per l'oggetto!
Questi file devono essere nominati allo stesso modo, ovvero CustomID.extension
Ogni cosmetico avrà la sua cartella, con questa struttura
CustomID/
├── CustomID.blockymodel
├── CustomID.png
└── Icon/
    └── CustomID.png
La cartella del cosmetico andrà messa all'interno di una certa cartella, a seconda del tipo di cosmetico:
Cosmetici
Il percorso base per i cosmetici è Common/Resources/ (le cartelle Common/Resources/Cosmetics e Common/Resources/Characters anche sono controllate, per compatibilità con versioni vecchie), seguito dalla cartella basata sullo slot, che può essere:
CapesEars_AccessoriesFace_AccessoriesGlovesHeadOverpantsOvertopsPantsShoesUndertopsUnderwearsBeardsEarsEyebrowsEyesFacesMouthHaircutsHair_ExtensionWingsTailsHornsFace_Details
Scegli quale di questi slots deve occupare il tuo cosmetico e inserisci la cartella che hai creato prima.
Quindi, per un cosmetico chiamato Custom_Cape, che si trova nello slot Capes, il percorso sarà questo:
Common/Resources/Cosmetics/Capes/Custom_Cape, e all'interno della cartella Custom_Cape:
Custom_Cape/
├── Custom_Cape.blockymodel
├── Custom_Cape.png
└── Icon/
    └── Custom_Cape.png
Lo slot Hair_Extension prende automaticamente il gradiente del'acconciatura.
Varianti (opzionale)
!Attenzione! Varianti e colori si escludono a vicenda!
!Attenzione! Le estensioni per i capelli (Hair_Extension) non possono avere varianti ne colori, cambiano a seconda del taglio di capelli!
Questa API ti consente anche di aggiungere delle varianti.
Per aggiungerle le varianti dovrai aggiungere le textures e le icone delle varianti all'interno della cartella del tuo cosmetico.
Le textures delle varianti devono essere messe nella cartella del cosmetico (CustomID) nominate come segue:
CustomID_Variant_NomeVariante.png
Le icone delle varianti devono avere lo stesso nome che abbiamo dato alla texture della variante ma a differenza di essa andranno messe dentro la cartella Icon/.
Facendo un esempio con il Propeller_Hat:
Propeller_Hat/
├── Propeller_Hat.blockymodel
├── Propeller_Hat.png
├── Propeller_Hat_Variant_Circo.png
├── Propeller_Hat_Variant_Arcobaleno.png
└── Icon/
    ├── Propeller_Hat.png
    ├── Propeller_Hat_Variant_Circo.png
    └── Propeller_Hat_Variant_Arcobaleno.png
Facendo così l'API caricherà: Propeller_Hat, Propeller_Hat_Variant_Circo, * Propeller_Hat_Variant_Arcobaleno*.
Saranno viste dall'API come varianti dello stesso cosmetico quindi implicitamente useranno Propeller_Hat.blockymodel come modello.
Colori (opzionale)
!Attenzione! Varianti e colori si escludono a vicenda!
!Attenzione! Le estensioni per i capelli (Hair_Extension) non possono avere varianti ne colori, cambiano a seconda del taglio di capelli!
Questa API ti permette anche di aggiungere più colori a un cosmetico!
Per aggiungere colori devi cambiare la cartella del tuo cosmetico così: Cosmetic_Id_Colors_GRADIENTSET
La texture dev'essere una scala di grigi (completamente desaturata)
ecco una lista di tutti i set di gradienti disponibili:
Colored_CottonEyes_GradientFaded_LeatherFantasy_CottonFantasy_Cotton_DarkFlashy_SyntheticHairJean_GenericOrnamented_MetalPastel_CottonRotten_FabricShiny_FabricSkin
Ecco un esempio:
Nome oggetto: Sample_Shirt
Alternativa: Colors
Set Gradiente: Colored_Cotton
Il nome cartella è: Sample_Shirt_Colors_Colored_Cotton
La struttura delle cartelle è:
Sample_Shirt_Colors_Colored_Cotton/
├── Sample_Shirt.blockymodel
├── Sample_Shirt.png
└── Icon/
    └── Sample_Shirt.png
I nomi di modello, texture e icona devono essere solo il nome senza _Colors_GRADIENTSET
Cosmetici Avanzati (opzionale)
All'interno della cartella del tuo cosmetico, puoi aggiungere un file CustomID.json (in cui CustomID è l'ID del tuo cosmetico). Questo file ti permetterà di personalizzare ancora di più i tuoi cosmetici.
All'interno del file JSON puoi cambiare il nome e il percorso del modello, della texture e dell'icona del tuo cosmetico. E non è tutto, potrai anche definire varianti o colorazioni del tuo cosmetico e decidere se occupa SLOT MULTIPLI!
Qui la formattazione corretta del cosmetico di esempio
{
    "model": "Resources/Cosmetics/Head/Propeller_Hat/Propeller_Hat.blockymodel",
    "texture": "Resources/Cosmetics/Head/Propeller_Hat/Propeller_Hat.png",
    "icon": "Resources/Cosmetics/Head/Propeller_Hat/Propeller_Hat_Icon.png",
    "slot_overrides": [
        //Inserisci gli slot qui, per esempio "Head", "Capes" ecc...
    ],
    "alternatives": {
        //QUESTI 2 SONO MUTUALMENTE ESCLUSIVI, O USI LE VARIANTI O I COLORI!!!
        //Scelta 1 (Colori)
        "gradient_set": "Hair",
        //Scelta 2 (Varianti)
        "variants": {
            "Variant": {
              "texture": "Resources/Cosmetics/Head/Propeller_Hat/Variant/Variant.png",
              "icon": "Resources/Cosmetics/Head/Propeller_Hat/Variant/Variant_Icon.png"
            }
        }
    },
    "default_color": {
        "gradient_set": "Hair",
        "gradient_id": "Red"
    }
}
"model" È il percorso del modello di cosmetico base ed eventuali varianti.
"texture" È il percorso della texture di cosmetico base ed eventuali varianti.
"icon" È il percorso dell'icona del cosmetico base.
"alternatives" Definisce che il cosmetico ha 1 di 2 stili di alternative
"default_color" Se il cosmetico utilizza texture in bianco e nero, definisce il colore equipaggiato dallo slot principale
Alternativa di Variante
"alternatives" >"variants" Annuncia la presenza di varianti che saranno elencate.
"alternatives" >"variants" > "variant1Name" Andrà sostituito con il nome della prima variante.
"alternatives" >"variants" > "variant2Name" Andrà sostituito con il nome della seconda variante.
Dentro i nomi delle varianti qui sopra citati ci sono le definizioni dei componenti della variante.
"alternatives" >"variants" > "variantName" > "texture" È il percorso della texture della variante in questione.
"alternatives" >"variants" > "variantName" > "icon" È il percorso dell'icona della variante in questione.
Alternativa di Colorazione
"alternatives" > "gradient_set" Il gradiente di colorazioni da usare
Lista dei gradienti:
Colored_CottonEyes_GradientFaded_LeatherFantasy_CottonFantasy_Cotton_DarkFlashy_SyntheticHairJean_GenericOrnamented_MetalPastel_CottonRotten_FabricShiny_FabricSkin
Categorie e Slot custom
Dalla versione 2.0, hai anche modo di creare categorie (I bottoni più a sinistra) e Slot (I bottoni a centro-sinistra).
Le categorie sono puramente cosmetiche, mentre gli slot sono anche usabili nei cosmetici
Schema json Categoria:
{
  "Name": "Capes"
}
Name: Il nome da mostrare, usato anche nell'assegnazione ad uno slot, ACCETTA SOLO LETTERE GRANDI E PICCOLE, NIENTE NUMERI O CARATTERI SPECIALE
Schema json Slot:
{
  "Name": "Capes",
  "Icon": "UI/Custom/Common/Categories/Categories/Capes.png",
  "SelectedIcon": "UI/Custom/Common/Categories/Categories/Selected/Capes.png",
  "TopLevelCategory": "Capes",
  "Camera": {
    "Distance": 2,
    "Position_Offset": {
      "X": 0.0,
      "Y": -0.3,
      "Z": 0.0
    },
    "LookAtBack": true
  },
  "CanVanish": true
}
Name: Il nome da mostrare, usato anche nell'assegnazione ad un cosmetico, ACCETTA SOLO LETTERE GRANDI E PICCOLE, NIENTE NUMERI O CARATTERI SPECIALE
Icon: L'icona del bottone
SelectedIcon: L'icona del bottone quando lo slot è selezionato
TopLevelCategory: La categoria del bottone (Vedi sopra)
Camera: Le impostazioni della camera quando selezioni lo slot
CanVanish: Se lo slot ha un bottone di scomparsa (Lo slot "Faces" è l'unico che lo ha a false)